Pages

Saturday, October 30, 2010

Baklava and other perfect marriages..


This blog posting is dedicated to the rich dense honey-soaked flavors wrapped in a light crispy shell otherwise known as Baklava. The two concepts of the rich and chewy nut filling and the light and buttery phyllo crust combine to make a perfect marriage. Opposites do attract after all. Remember Beauty and the Beast or how about Fred and Wilma Flinstone or even Lucy and Ricardo. All of our favorite characters mimic this idea of opposites put together and delighting and entertaining us. Just like this dessert.

With Halloween just around the corner what better way to celebrate than with a dessert from another world.. the Middle East to be exact. And with lower sugar content than the average Halloween candy this just might keep everyone from reaching those much dreaded sugar highs and lows.

A couple of tips for you. The food processor was brilliant to grind the nuts and I would definitely start with the almonds before adding the walnuts so they turn out being ground evenly. Also, you can use any kind of nut that you like. We also managed to shave a few calories by using Splenda when we could and using Smart Balance butter to cut the saturated fat of the regular butter.

We also used the best honey we could find. Locally produced by Mr. Lambeth himself and we used a little bit of spiced rum just for fun. If you don't want to use rum you can always substitute vanilla extract.

Happy Halloween and may you receive more treats than tricks!

Baklava

for filling:

1 cup unsalted almonds
2 cups walnuts
1/2 cup milled flaxseed
12 packets Splenda
1 1/2 tablespoons cinnamon
1/2 teaspoon ground clove

For the layers:

1 package phyllo dough
3 tablespoons smart balance butter
2 tablespoons salted butter
1/2 teaspoon dark spiced rum
1/2 teaspoon cinnamon
For the syrup:

1 cup water
1 cup honey
1 cinnamon stick
1 teaspoon ground cloves

1. Preheat the oven to 325 degrees.

2. In a food processor add the almonds and walnuts and process for 30-40 seconds. The nuts will be coarsely chopped. You don't want to turn them to mill, just finely chop them so there are still some healthy chunks in there. 
3. In a bowl combine the chopped nuts, flax seed, splenda, cinnamon, and clove. Stir with a spatula to combine. Then set aside.

4. Melt the smart balance, butter, spiced rum, and cinnamon in the microwave for 30 seconds. Then lay your phyllo dough out on a flat surface and cover with saran wrap and a damp towel. Spray a 9 X 12 baking dish with cooking spray. 

5. Uncover the phyllo dough and work quickly using a pastry brush lay one phyllo layer at a time in the baking dish and brush with the butter mixture. Repeat this layering and buttering process until you have 12 layers of phyllo dough on the bottom. Re-cover the phyllo dough and pour the nut mixture on top of the bottom layer spreading into an even layer.
6. Then repeat the phyllo dough butter process using one sheet of phyllo dough at a time and completely saturating each layer with the butter mixture. The top layer should have 8 phyllo sheets. Next score the top layer of the baklava using a sharp knife into squares. Make sure to only puncture the top layer.

7. Place in the oven and bake for 45 minutes. 

8. Meanwhile in a medium sauce pan, combine the honey, water, cinnamon stick, clove, and squeeze half the orange and then drop the rind into the pan. Simmer over medium low heat while the baklava bakes. 

9. Once the baklava has come out of the oven ladle the syrup evenly over the top of the baklava making sure to saturate every inch of it with the delicious honey syrup. Let it sit at room temperature for at least 1 hour (this will be difficult) and eat! You can also refrigerate this if you would rather have it cold.

Servings: 20

Nutritional Skinny:

210 calories / 19 g fat / 21 g carbohydrates / 2.6 g fiber / 5 g protein

This is compared to the original that has over 330 calories and more than 22 fat grams and 30 carbohydrates!

Mental Health Benefit: This Halloween you can definitely feel a little better about eating this treat over a candy bar, however I know that not eating a candy bar on Halloween is kind of a crime. My biggest tip is to never, ever, ever beat yourself up. Treat yourself like you would your best friend. Forgive yourself and smile and move on. Life is to short to be spending it beating ourselves up. Life is to be lived and enjoyed! Lets go out there and do that!

My best Halloween wishes from our kitchen to yours!


Monday, October 25, 2010

Chocolate Whiskey Cupcakes

We recently found a advertisement for the best cake recipe EVER. Our first thought was the  Chocolate Whiskey Cake our dear friend Lee makes for every special occasion. She has made it for everyone's birthday and the latest was my sister's engagement party. She was even so wonderful as to bring me the recipe so I could write it up on my Ode to Twenty Eight blog.

Well, today I decided to actually make the cake. It's a cake with chocolate and whiskey, are you kidding? This is a no brainer! I think this is sure to win if it tastes anywhere as good as it sounds.
I made a few changes not because the cake needed changes, but because I didn't have all of the original ingredients she uses. I did a few 'operational work arounds' and made cupcakes. Believe it or not I don't have cake pans. Don't worry-- it's on the shopping list now. But who doesn't love cupcakes and since I am baking them for our sous chef's birthday at work, it makes it really easy to share.

While testing out this recipe I discovered how that I didn't have any milk powder. So I discovered how to substitute. Please forgive me if you are a kitchen protege and already know about this. If you don't have milk powder (like I don't) you simply used 1 cup of milk for every 1/4 cup of milk powder that is called for in the original recipe and then omit that additional cup or two of water the recipe calls for. Milk powder is a 1 to 4 ratio. For example this recipe called for 1/3 cup milk powder and an additional 1 1/4 cup of water. Instead I omitted the water and added 1 1/4 cup low fat milk.

Mom and I also just spent Sunday tasting wines at our local Mission Mountain Winery (located one mile from our house) and picked up some delicious Cocoa Vin dessert wine which we decided to use that for the frosting. The wine maker and owner Tom and his wife, Hema, are as delightful as the sun is bright and turned us on this this and several other wines we will be talking about in upcoming blog posts. 
As promised on our facebook page this is our first recipe of many incorporating their award winning wines. We used our two favorite ingredients: dark chocolate and Cocoa Vin chocolate liquor. A match made in heaven.

And don't worry if you don't have Cocoa Vin you can either order from the website (which is beautiful) depending on which state you live in or substitute any chocolate or coffee liquor. If you don't want to use liquor you can also substitute vanilla or rum extract. Enjoy!


Chocolate Whiskey Cupcakes with a Cocoa Vin frosting

adapted from: Lee’s Special Dark Chocolate Whiskey Cake

Heat oven to 350 degrees F.

Dry Ingredients

2 C. Organic Flour
1 ½ tsp. baking soda
¾ C. Dark Chocolate Cocoa
1 tsp. salt
1 ½ tsp. baking powder
1 tsp. cinnamon
1 tsp. dried clove powder

Wet ingredients

2 eggs
3 teaspoons vanilla
½ C. Irish whiskey (we used Bushmills)
¾ C. honey (we used local Lambeth Honey)
½ C. water
½ C. canola oil
1 cup milk (or fat free half in half is what we used)
 
1. Mix the flour, baking soda, cocoa powder, salt, baking powder, cinnamon, and clove together. Set that bowl aside.

2. In a separate bowl combine the wet ingredients and stir with a whisk until the honey softens into the other ingredients.

3. Then pour the wet ingredients into dry ingredients and mix well-about 2 minutes on medium. (You don't need the additional ingredients as the original recipe called for because we used milk instead of the milk powder.) Batter will be thin.

4. Spray your muffin tins and fill with 1/4 cup of batter. Cook 20-25 minutes or until toothpick comes out clean. Cool the cupcakes for 20 minutes then remove from pan and cool on rack. 
 5. When cup cakes are cool, they are ready to frost with the delicious frosting below!


Cocoa Vin Chocolate Frosting
1 T. organic butter
1 (3.5 ounce) bar Hershey's dark chocolate; chopped 
3 tablespoon honey
2 tablespoons cocoa vin (If you can't find Cocoa Vin any chocolate or coffee liquor with work!)
3 Tablespoons Cocoa powder

1. Melt butter and chocolate in the microwave for 1 minute at power 50. Remove and stir until chocolate is completely melted and smooth. 

2. Add the cocoa vin, honey, and cocoa powder. Stir to combine with a whisk until it is smooth and shiny. 


3. To frost hold the bottom of the cupcake and dip the top in the frosting. Remove from the frosting and swirl to get a clean frost on the cupcake. Repeat with all of the cupcakes and allow to set for 15 minutes.


Servings: 24 cupcakes

Nutritional Skinny (without frosting):

127.5 calories / 5.1 g fat / 18. 3 g carbohydrates  / 1.2 fiber / 3 g protein

Nutritional Skinny (with frosting):

165.3 calories / 7.1 g fat / 24 g carbohydrates / 2 fiber / 3.5 protein 


Mental Health Benefit:  When you think about chocolate cupcakes you usually think sinful-- right? Well, these taste completely sin-licious. I put one in my mouth and was transported to the palm of an angel's hand. Then I calculated the calories and was blown away. These not only are lower in fat and calories than other options they are also loaded with anti-oxidants and flavonoids in chocolate that protect our bodies from free radicals (those nasty things that cause aging) and have been shown to lower blood pressure. So as sin-licious as these taste, there are some really important health benefits if we eat them in moderation! Okay.. good luck with that!


~ Why not meet me in the kitchen and get cooking!


Friday, October 22, 2010

Wild Game in the Wild West

I live in the Wild Wild West. Northwest Montana to be exact. When I forget and think I'm back in Chicago, there are a few things that remind me:
  1.  There are illuminated road signs that instead of indicating the commute time, they inform travelers to watch for grizzly bears crossing the road for the next 5 miles.
  2. My parents had cocktail hour with a black bear last night and he has sort of become our new pet (my cat isn't thrilled about this).
  3. The only sky scrapers around are the giant Mission Mountains out our back door.
  4. Everyone I have met has elk, venison, grouse, bobcat, bear, and other wild animals in their freezers.
In honor of the opening of hunting season kicking into high gear, I am sharing some of our favorite wild game recipes! This will also celebrate the circle of life that we experience every time we eat something that is so graciously provided for us by mother earth.

Don't worry if you don't participate in this circle of life phenomenon called hunting. You can use regular beef or pork for these recipes and it will taste just as delicious.
I'm sharing a wonderful and easy Elk Cutlet recipe (made from the back strap which is the best cut off the animal) along with a fabulous slow cooked Spicy Asian Venison Roast and delicious and healthy Whipped Potato and Carrot side dish that pairs perfectly.


Tips for cooking with wild game:
  • Since these cuts are extremely lean, you want to be careful not to over cook. All cuts should be prepared rare or medium rare for maximum tenderness.
  • Meats can be aged in the refrigerator for 3 to 7 days to enhance tenderness
  • Marinade meats in soy, wine, ginger, or garlic based sauces (we use all of them in our recipe)
  • For more tips and recipes
Both cuts of meat were delicious and extremely tender and juicy and I didn't even need a knife, just a fork. And with almost half the calories, a third the fat, and more than 6 additional grams of protein why shouldn't it be what's for dinner?

Beer and wine pairing suggestions:

Wine - We recommend serving this with a bold red wine (we love Crane Lake Cabernet Sauvignon) which is consistently delicious and cost effective)

Beer - a great Amber beer (we love the Local Tamarack Yard Sale Amber and Full Sale Amber is also delicious).

Elk Cutlets
6 (4 ounce) elk cutlets * if you don't have elk you can substitute with sirloin beef cuts.

For the breading and dredging station:

1/2 cup whole wheat flour
1 teaspoon seasonal salt
1 teaspoon pepper
1 teaspoon red pepper
2 teaspoons garlic powder

2 eggs, beaten

1 cup Italian bread crumbs

1. To start, gently pound out each cutlet using a mallet to tenderize. Lightly pound them out, but don't get too out of control. We want to eat this remember?

2. Next we'll set up the dredging station. Place three separate shallow bowls on the counter. In the first add the flour, salt, pepper, red pepper, and garlic powder. In the second bowl add the beaten eggs. And in the third, you guessed it, put those bread crumbs in there.

3. Now take each cutlet and dredge through the flour mixture, then give it a bath in the egg mixture and finish with a jump in the bread crumbs.

4. Heat a skillet with olive oil or vegetable oil. You'll only need about 1 tablespoon in the bottom. Once the pan is hot, place each cutlet and cook for about 4-5 minutes on each side. Then you are ready to transfer to a plate and eat!

Servings: 6

Nutritional Skinny:
211 calories / 3.3 g fat / 31 g protein

Compared to beef cutlets: 462 calories / 26.2 fat

Spiced Asian Venison Roast
1 white onion; chopped
1 green pepper; sliced
4 cloves garlic; minced
1 1/2 pound venison roast
1 tsp. chicken rub
1/2 tsp. dried rosemary
1/2 tsp. dried garlic powder
2 tsp. Worcestershire sauce
1 cup dry red wine (we love anything from Australia)
2 tbsp. soy sauce (low sodium)
Juice of half of a lemon
3 sprigs fresh rosemary
2 bay leaves

Note: our roast sat in the fridge for 7 days which made it extra tender!

1. In a large crock pot add the diced onion, peppers, garlic to the bottom. Turn the crock pot on to low.
2. Take the venison roast and sprinkle the chicken rub, rosemary, and garlic powder on both sides. Place the roast on top of the onions and peppers in the crock pot. Add the two bay leaves to the crock pot.

3. In a separate bowl combine the Worcestershire, red wine, soy sauce, and lemon juice. Stir to combine, then pour over the meat in the crock pot. Add the rosemary and bay leaves and cover. Cook on low for 6-8 hours. The meat will come out tender and delicious. Slice and serve reserving the broth for a gravy.

It will separate easily and the sauce is to die for! Serve with the Whipped Potato and Carrots for a complete nutritionally sound meal!

Servings: 6-8


Nutritional Skinny: 
159 calories / 3.3 g fat / 25 g protein


Whipped Potatoes and Carrots

1 pound baby carrots; chopped
1/2 pound red potatoes; cubed
4 ounces low fat cream cheese
1/2 cup 1% milk
Salt and pepper to taste

1. In a large pot place the chopped carrots and potatoes and cover with water. Cook over medium high heat for at least 60 minutes. The water should be lightly bubbling.

2. Once the potatoes and carrots are both softened, pour the water off and add the cream cheese, milk, and a pinch of salt and pepper (approx 1 teaspoon each). Using a mixer whip the potatoes and carrots until smooth.

3. Serve with the Venison roast with some of the broth poured over for an added treat.

Servings: 10


The Nutritional Skinny : 
119 calories / 2.5 g. fat / 21 carbohydrates / 2.5 g fiber / 3.6 g protein

Mental Health Benefit: There are always alternatives to the standard pork, beef, and chicken. Why not experiment with something new? Bring a new zest to the dinner table. It's sort of like getting a new style of jeans or a new hair cut. Cooking with something new adds a little extra spring to the step and a little more confidence that we all need to take on the world each day! Oh, but don't feed the bears. That's how we ended up we a new pet... we found out they really like bacon.

Now get your Hot Mess Self in the kitchen! :)
 

Monday, October 18, 2010

BLT and Simple Pleasures

Just a word on bacon. Should we use it in moderation? Yes. Is it delicious? Yes. And finally does a small amount go a long way? Absolutely.
With that out of the way, let's talk about one of the most delicious sandwiches known to human kind. The BLT. It's simple, tasty, and always satisfying. I realize that a recipe for a BLT seems rather silly, right? Well, I might agree with you, however I have been making these sandwiches for years and there are certain tricks to making them even tastier. 

A few of those tricks are: 1) Get the yummiest bread you can possibly imagine, 2) Cook the bacon until it is just slightly crisp, but still has a little softness, 3) Skip the mayo and go straight for ranch (I used the Kefir light Ranch with probiotics), and finally 4) add some fresh basil! Trust me on this last one!
Then after wards, go play outside. There are horses just below me and they love to play, but if you don't have horses to play with maybe you have kids, a dog, or a neighbor who would like to come out and join you. Either way getting out in the great outdoors makes this sandwich somehow taste even better. And play is exercise! Don't forget that! I went with my honey and we tromped through the woods in hot pursuit of some fire wood. As we were bumbling through I looked around and commented, "Somehow being out in the woods makes you realize that nothing really matters. You know?" To which he responded, "Yeah, it's important to remember how simple life can be."

Exactly, just like our lunch. Simple and delicious. For simple pleasures.. I am so grateful..

Now here is my secret recipe for a slammin' BLT! And check out the nutritional 'skinny' below!

Bacon Lettuce and Tomato Sandwich (the Famous BLT)
 yields 3-4 sandwiches

1 package smoked bacon
4 focaccia rolls
1 head of romaine lettuce
1 fresh ripe red tomato
1/4 cup Kefir Light Ranch dressing
1 bunch fresh basil leaves

1. Start with your favorite skillet and fry up the bacon low and slow. The key to delicious bacon cooked perfectly is cooking it over low heat slowly so it can crisp without becoming hard and brittle. Cook each slice over low heat for about 8-10 minutes on each side. Once each slice is cooked drain on a paper towel. 
 2. Slice the most delicious ripe tomato you can find (we found a perfect one at the Helena farmer's market). Clean and separate your romaine lettuce and slice each focaccia roll in half. I loved the whole grain focaccia we found at the bakery. It made the sandwich even tastier! 
 3. Now we build the sandwich.Spread a thin layer of the Kefir Ranch dressing on each half of the roll. Place a slice or two of tomato on the bottom of the roll and add salt and pepper to taste. Place two slices of bacon to the top and add 2 leaves of romaine lettuce and 4 leaves of fresh basil. Place the top of the roll on and eat!


4. This would be tasty with some fresh cantaloupe or a slice of pear. We ate them just as is and were beyond satisfied.

Nutritional Skinny:

280 calories / 14 g fat / 22 g carbohydrates / 13 g protein


Mental Health Tip: So the lesson today is if you want something delicious like bacon, go ahead and have it. We have to live thoroughly right? However, remember that a little goes a long way. Two slices is all you need to get that yummy buttery flavor and load up on tomatoes, lettuce, and basil. You will get the vitamins you want and the flavor that satisfies without sabotaging your girlish figure. Go outside and live thoroughly. There is nothing better than getting lost in the woods.

Friday, October 15, 2010

Dangerously Delicious Layered Raspberry Cake

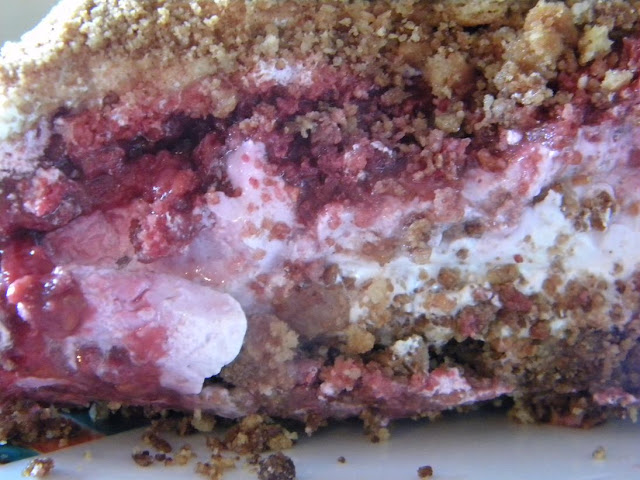
Trust me on this one. This Raspberry Layer Cake is delicious. No joke. When I served it to my dinner guests they were stuffed from eating steak, shrimp, and potatoes and every single one of them (me included) finished our own huge piece. It is that good. Seriously. Try it yourself, but at your own risk. I sat one evening and ate close to half a pan with a spoon right out of the dish.
Yes, I did. I'm not proud of it. But I did it.

My theory on that is that with the cream cheese and whipped topping, it just sort of melts into the cracks so there is always room, right? Make this cake and you won't be sorry unless you eat half a pan by yourself like I did. Even then, you won't really be sorry you ate it all, you will be more sorry that it's all gone.
Then a trip to the store will follow shortly after to make another cake... Yes, it's that good.

Now let's get on with the recipe!

Raspberry Layer Cake

for crust:

1 1/2 cups Graham Cracker Crumbs; reserve 2 tbsp.
1 tsp. Cinnamon
1 tbsp. Vanilla Extract
1 tablespoon Milled Flax Seed
2 tbsp. Smart Balance Butter; melted

for raspberry filling:

10 ounces Frozen Raspberries
1/2 cup Baking Splenda
1 tbsp. Corn Starch
2 tbsp. Water

for Cream cheese layer:

8 ounces low fat cream cheese
1/2 cup Baking Splenda
4 ounces Light Cool Whip

for topping:

4 ounces Light Cool Whip
2 tbsp. reserved graham cracker crumbs mixture
1. Take your graham crackers and break them up in the food processor and pulse for about 30 seconds or until you get nice thin crumbs. Then add the flax and cinnamon and pulse for a few more seconds.
2. Then in a microwave safe bowl melt the butter for 45 seconds. Pour into the graham cracker crumbs. Add the vanilla and mix until a moist crust forms. Spray the bottom of a large pan and press firmly into the bottom.  Spread on the bottom of a round deep dish pie plate. Bake in a 350 degree oven for 15 minutes. Then set aside to cool.
3. Combine the water and corn starch until the water is smooth. 
4. In a sauce pan combine the raspberries, splenda, and corn starch mixture stirring over medium heat until the mixture thickens-- about 5-6 minutes. Then remove from heat and set aside to allow to cool and continue to thicken. 
5. In a large separate bowl, combine the cream cheese and splenda creaming it until it is smooth. Then carefully fold in the cool whip until it looks like clouds! Set aside.
6. Now we build the beautiful dessert! Spread the cream cheese layer over the  graham cracker crust. Top with the raspberry filling. Then spread the remaining 4 ounces of cool whip over the top and sprinkle with the topping mixture.  Refrigerate for at least 30 minutes, but you can do it for up to 24 hours if you so desire! Delicious and oh so easy!

Servings: 12

Nutritional Skinny:


200 calories / 11 g fat / 2 g carbohydrates / 2 g fiber / 2.7 g protein

Mental Health Tip: This dessert can be even lower in fat if you want to use fat free cream cheese and cool whip. And it will taste just as good. Most of the flavor comes from the super delicious and healthy raspberries! Enjoy yourself and these fresh flavors of summertime!

Saturday, October 9, 2010

Real Honest Confessions and Recipes

If you are anything like me (and God knows I hope your not), some days are better than others. Most days are fantastic as most people who know me already know--I am a positivity drill Sargent. Everything I see and do I make into a positive. No matter what.

That ruined quiche? A lesson in adding less milk. Oh and that broken wine glass? An omen for good luck. You get the picture.

Well, I'm human too and I feel the opportunity to be really real with you all here. The other day, I was less than positive. As I like to say, I lost my little nugget of 'good enough' and fell out of my bubble. Here is what that looked like:

I'm happily riding my bike down my road when a neighbor passes and we wave our good mornings and he comments on my tire. "Hey your back tire is getting a little low. May need some air."

"Thanks." I shout back as I hear my inner critic say, "Oh that's just my fat butt."
What? Where did that come from? That was my indicator that my 'good enough' nugget was lost and my bubble was no where to be found. I will spare you the details of what followed There were tears, confusion, frustration, and then finally release. I let go of the stupid words and thoughts I was holding on to and took a deep breath and let go of it. Then I saw my bubble come floating back-- there you are! And I climbed back in and surrounded myself with a whole bunch of tulips. Today, I filled my back tire with air and went for a peaceful bike ride!

In this world there is a lot of things that we have to protect ourselves from--people's words, emotions, and anger that it is too easy to absorb. My mom taught me a meditation on protecting myself. It worked so well that I made her video the description. This is your own private session with Mother Teresa (okay my mother, but her name is Teresa). There are four elements she describes: 1)Grounding 2)Cleansing 3)Protecting and 4)Releasing.


I think it worked for Frankie.. See for yourself:


Once you have protected yourself, it's okay to be real with your limits and with just how special you are right now. Just like the fresh fruit basket a friend so graciously brought us filled with pears, plums, and peaches. In order to honor the fruits as we honor ourselves we decided to keep the flavors fresh and make a fabulous Harvest Fruit Tart. This was my first ever and I think it turned out pretty darn good.

My parents got busy making some Creamy Mushroom Chicken, Collard Greens and Cabbage, and Southern Beans to go with it. I mean we can't just eat dessert... or can we? I'll leave that up to you to decide.
I hope you enjoy these recipes and yourselves. Life can be difficult, but only if we let it be. I am choosing to smile and protect myself and for goodness sakes keep my arms and head inside my bubble at all times!

Creamy Chicken
6 large bone in chicken breasts
1 heaping tablespoon of Chicken seasoning
2 teaspoons black pepper
1 can (10.3 ounces) 98% fat free cream of mushroom soup
2 tablespoons fat free half and half
1/2 cup white wine (Chablis works great here!)
1 cup low sodium chicken broth
2 tablespoons minced garlic
2 tablespoons low sodium soy sauce
1 cup plain fat free yogurt (you can also use fat free sour cream if you have that on hand)
1 large sweet white onion; chopped
12 ounces fresh white mushrooms; sliced in half (you can use canned if you prefer)

1a. Remove the skins and unnecessary fat from each chicken breast. My dad does this easily with a sharp knife. The before looks like this:
The after looks like this: Brilliant!
1b. Then cut each breast in half. Sprinkle with chicken seasoning and pepper. Place in a skillet, or if you have the fabulous crock pot that we do, brown in the crock pot using the browning element.  Brown the chicken for 3-4 minutes on each side (just enough to brown the chicken and the flesh will turn white)
2. While the chicken is browning-- in a large bowl, combine the cream of chicken soup, the half and half, white wine, chicken broth, garlic, soy sauce, and yogurt. We pour all of the liquids into the cream of mushroom can to continue to rinse out and get all the flavors out of the can!
3. Once the chicken is browned, transfer to the 10 quart crock pot, or if you are using the fabulous crock pot that we have transfer the heating element to slow cook. Add the chicken, onions, and mushrooms to the crock pot and pour the creamy broth over the top.


4. Cook on low for 8-10 hours or on high for 4-6 hours.
Collards and Cabbage - Best Friends Forever
1 large onion; chopped
16 ounces smoked ham; diced
1 tablespoon extra virgin olive oil
1 teaspoon kosher salt
1 teaspoon black pepper
6 cups low sodium chicken broth
1 teaspoon apple cider vinegar
6 big bunches of fresh market collard greens
1 large cabbage; chopped


1. In a large pot combine the chopped onion, ham, olive oil, salt, and pepper. Allow to saute for 3-5 minutes or until the onions become translucent.


2. Add the chicken broth and vinegar to the pot and bring to a boil.


3. Meanwhile we will prepare the collard greens. Slice the collard green leaves away from the central 'root' of the leaf. Slice into over sized pieces, they will wilt similar to spinach. Next place the chopped leaves in a colander and rinse using cold water making sure to get any grit off of the leaves. Once washed place the collards into the large stock pot with the boiling broth.  Simmer on low for 60-90 minutes. 


4. Next add the chopped cabbage. The cabbage will take considerably less time to cook. Simmer for another 30 minutes over low heat. Then they are ready to be served along side your country beans, corn bread, and delicious creamy chicken!


Southern Style Beans
 4 slices bacon; chopped
1 small white onion; chopped
2 stalks celery; cleaned and chopped
2 large carrots; peeled and chopped

2 (16 ounce) cans white beans or pinto beans


1. Saute the bacon in a skillet then remove from the skillet and drain the grease and wipe out the skillet. Add the olive oil, bacon, celery, carrots, and onion to the skillet.


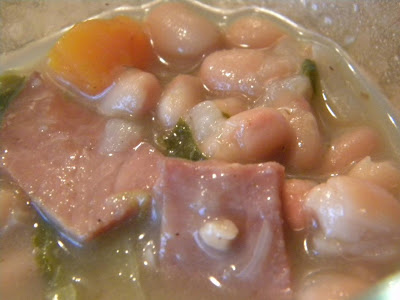
2. Once the vegetables soften after 10-15 minutes add the beans and simmer over low heat for another 10-15 minutes to allow flavors to marry. 


3. Add a pinch of salt and pepper to taste and serve!

Fall Harvest Fruit Tart
1 prepared pastry crust

for crust:
1. Spray a 10-inch-diameter spring form pan with cooking spray, then spread the prepared pie crust evenly into the pan. You can evenly spread the dough pushing slightly to make for a nice crust. Then gently roll the edges over creating a one inch tall crust. Bake in a 450 degree oven for 10-15 minutes.


2. Remove from the oven once the crust is brown and set aside to cool.


for the cream filling:

6 ounces fat free cream cheese
1 1/2 cup fat free ricotta cheese
1/4 cup sugar free maple syrup
6 splenda packets
1/4 cup spiced rum


3. Combine the cream cheese, ricotta, maple syrup, splenda, and rum in the food processor. Process until smooth. 


For the fruit topping:


12 baby plums
3 small peaches


4. Thinly slice the plums and peaches into beautiful half moon shapes.


To arrange:


5. Once the crust has cooled for at least 20 minutes, spread the cream mixture over the top in one even layer. 


6. Next place the fruit in beautiful circles on top of the cream cheese and ricotta base.


Topping:


1/2 cup sugar free apricot preserve
1 tablespoon honey
1 tablespoon spiced rum
1 tablespoon crust graham crackers
1 teaspoon cinnamon

7. In a microwave safe bowl, combine the apricot preserves, honey, rum, and cinnamon. Heat for 30 seconds in the microwave to soften the ingredients. Then gently drizzle the topping over the fruit and finish with a sprinkling of the crushed graham crackers.

 8. Refrigerate until you are ready to serve! Enjoy this beautiful and easy dessert alone or with guests! Our guests loved it.. you can tell... ;)

Monday, October 4, 2010

Peach Shortbread Cobbler

Time with my sister and her fiance was priceless. And her future mother in law had a delightful time as well. I mean seriously.. look how cute they are? And don't we make a cute looking family? Alright.. I'll stop tooting our horns..

We were so happy to have them come and stay and so sad to see them have to go. But such is life, right? Everything comes and goes, much like the peach season.
We are at the very end of the peach season here and I got in just at the right moment at the farmer's market and ended up with a whole box full! For those who don't know me, I absolutley love peaches and pears. Those are my two favorite fruits in the known world (we won't get into the unknown today).

I love a really good cobbler, but I also love a really nice shortbread, so I thought I would try combining the two concepts and adding a little whole wheat to make this less of a sin and more of a heavenly treat! And kids! Did this ever work perfectly! Try it out with the last peaches of the season! You won't regret this last taste of summer!

Peach Cobbler with Shortbread
Shortbread topping:

4 tablespoons butter
1 3/4 cup whole wheat flour
1 teaspoon baking soda
1 teaspoon baking powder
3 tablespoons sugar free maple syrup
5 tablespoons baking Splenda
1/2 teaspoon salt
1/2 cup low fat sour cream
1/3 cup fat free half and half
1 teaspoon vanilla
1 teaspoon cinnamon
1 teaspoon all spice
1/2 cup pecans

1. Melt butter in a medium sauce pan over medium heat stirring occasionally with a whisk until the butter turns caramel colored and smells fragrant, approximately 6-8 minutes. Pour into a small dish and place in the freezer to cool the butter down.

2. Pour the flour, baking soda, baking powder, maple syrup, sugar, and salt in the bowl of a food processor. Pulse to combine. Then add the cooled butter and continue pulsing until the mixture looks like a coarse meal and smells divine! Add the sour cream, half and half, pecans, vanilla, cinnamon, and all spice. Continue pulsing until a dough forms. Place in a large bowl and refrigerate until we are ready to assemble.

For the filling:
8 cups fresh peaches; sliced with skins on
3 tablespoons whole wheat flour
3 tablespoons baking Splenda
1 tablespoon cinnamon
1/2 tablespoon all spice
1/2 cup pecans; chopped

3. Combine the peach slices, flour, splenda, cinnamon, and all spice in a large bowl turning to coat each of the peach slices. Spread the peach mixture in the bottom of a greased 9 X 12 baking dish.
4. Next, grab the shortcake topping out of the fridge and glob (yes-- this is a technical term here) mounds of the shortcake mixture over the peaches. Spread it liberally over the top. It doesn't have to be perfect, just make sure most of the peaches are covered. Sprinkle with the chopped pecans

5. Place the cobbler in a 325 degree oven and bake for 45 minutes. Then cover with foil and turn the oven down to 300 degrees and bake for an additional 45-55 minutes or until the peaches are bubbling with extreme enthusiasm (once again a technical term). Remove from heat and allow to cool. Serve with vanilla ice cream and whipped cream! Oooh La La!

Mental Health Tip: The end of summer always makes me feel a little whimsical.. nostalgic. It always reminds me of the end of Dirty Dancing where the cast is singing that end of summer song and they have the dance. I can't dance like that, but I can cook and especially now living on the lake, people really do pack up and leave for warmer destinations like Arizona and California to escape our beautiful winters. What helps me is to take these little gems I call peaches and live another moment of summer in a simple dessert.

Enjoy and happy fall!

~ Us cute "Hot Messes"