Pages

Monday, November 8, 2010

Warm Roasted Eggplant Salad... yum!

I recently had some eggplant hanging out in my fridge begging me to cook it. Okay-- so begging isn't the right word, but you get the point. It was time to use it or loose it.


I've done eggplant Parmesan and I've also done Nepolians, but I wanted to do something really easy and I had some delicious feta cheese in my fridge which was the inspiration for this warm roasted eggplant salad.
Cheese happens to be one of my favorite things on the planet. Please excuse me if you don't agree, but I have been known to tell people that I can live on cheese, pears, and wine and be perfectly happy. I literally swoon while circling the cheese island like a predator at the grocery store. I have to be monitored closely or all of my hard earned money might go to fresh mozzarella in whey, double cream brie, or heaven forbid, fresh dutch sharp cheddar. This stuff ain't cheap folks-- but it's my weakness, okay? There--that's my confession for the day.

That being said, I always have either a feta or blue cheese in my fridge along with the old stand-byes sharp cheddar, mozzarella, muenster, Jarlsberg, and pepper jack. If you don't have feta, you can substitute Gorgonzola, blue cheese, or even a little dab of cream cheese cut into small clouds to top this dish would be delicious. I may have to try that next.


Note: I also recently made this recipe with shrimp on top that I sauteed in a skillet with a tsp. of olive oil and minced garlic and brought it to my writer's group and they loved it! They said they didn't want to know what the original recipe was because what I brought was so delicious! You can also add chicken if you want some added protein.
Warm Roasted Eggplant salad
1 small eggplant; skin washed and diced
4 garlic cloves; minced
2 tbsp. olive oil
1/2 cup fresh corn
1 tbsp. Italian seasonings
1/2 tsp. salt
1/2 tsp. pepper
1 can artichoke hearts
1/4 cup sun dried tomatoes; oil packed
1/2 cup walnuts; chopped
1/2 cup crumbled feta cheese

1. Combine eggplant (with skin on), garlic, olive oil, corn, Italian seasoning, salt and pepper in a large bowl. Transfer to an oven safe dish and bake in 400 degree oven for 20-25 minutes.

2. Add the sundried tomatoes and artichoke hearts to the mixture and return to the oven for 15-20 more minuntes.

3. Meanwhile place the walnuts in a small dry skillet and toast over medium heat for 5-8 minutes. When the nuts become fragrant they are done.

4. When the eggplant mixture is ready to serve, plate with fresh spinach leaves underneath (if desired) and top with the toasted walnut pieces and crumbled feta.

Servings: 10 servings

Nutritional Skinny:


100 calories / 6.8 g fat / 7.6 g carbohydrates / 3.3 g fiber / 3.5 g protein


Mental Health Benefit:  Eggplant is an excellent source of fiber and is very low in fat and calories making it the perfect substitute for meat when cooking. It has a meaty thick texture so you don't have to miss the chewy texture. I also leave the skins on because the skins have nasunin which is a powerful source of anti-oxidants which fight free radicals and help prevent aging. Eggplant also have a low glycemic index which helps those of us who are diabetic or looking to reduce carbohydrates in our diets.
Oh and I had to share! This is what got me out of bed this morning! Enjoy this recipe and your day. May it be filled with health, wellness, and abundance!


Thursday, November 4, 2010

Easy Bread Recipe

I'm one of those lucky women who happen to like baking, cooking, and cleaning. However, it gives me the greatest pleasure to get to do these acts of service as a gift to others. 

Today my gift of cooking and cleaning is for dear friends. We have been invited for dinner and I am in charge of bringing bread. Since I love to bake and the new house rule is never buy bread when you can bake your own-- homemade bread here we come.

I look around the house searching for inspiration and that's when I stumble quite literally into the kegerator. Yep, Scott is a home brew kind of guy and he built his own kegerator and now we brew beer together. The lightning strike of inspiration comes and I find a great beer bread recipe. I made some adjustments and added a few savory touches and what came out of the oven a mere 45 minutes later was miraculous.  I also got to use some of Scott's Dad's honey.
There no waiting for the dough to rise or kneading involved and since I wanted something fast and easy this was the perfect recipe. It literally took me three and a half minutes to mix the dough and pop it into the oven. 

If you don't have your own kegerator filled with your home brew you can use 12 ounces of whatever beer you have laying around. I used the Amber that we had made and it brought some sweetness to the bread which is why I added the Parmesan cheese and Italian seasonings to the bread to play up the savory and sweet side of the bread. After dinner I was rewarded with an empty plate. Not a slice left over... Just the way I like it!


This could easily be sliced and used for sandwiches or to enjoy along side a juicy grilled steak or chicken like we did. Enjoy this recipe and stick around.. There will be more bread recipes coming your way! This is only the beginning of my bread making extravaganza!

Brew Bread 

 2 cups unsifted self rising flour
2 tablespoons honey
12 ounces of beer, room temperature
3/4 cup Parmesan cheese
1 tablespoon Italian Seasonings


1. Preheat the oven to 375 degrees.

2. In a large mixing bowl combine the flour, honey, beer, Parmesan cheese, and Italian seasonings using a spatula. The dough will be tacky and glue like resembling wet biscuit dough. 

3. Pour the batter into a greased bread pan and sprinkle with a teaspoon of extra parmesan cheese and Italian seasonings if you desire. Bake for 45 minutes. The dough will double in size as it cooks.

4. Remove from the oven and cool then slice and enjoy with Smart Balance butter or Extra virgin olive oil for a treat!

Servings: 12


Nutritional Skinny:


129 calories / 2 grams fat / 18 grams carbohydrates / .6 grams fiber / 4.7 grams protein

Mental Health Benefit: Believe it or not.. beer can aide in a healthy lifestyle (in moderation of course). Beer has many B vitamins and has also been shown to increase the level of anti-oxidants in the blood stream as well as increase the good cholesterol (HDL) and decrease the likelihood of blood clots. Also, since you are using it to bake with the alcohol is cooked off so you are left with the healthy side effects from the grain brewing without the head ache the next day!

I hope you enjoy making bread as much as I do!

Cheers!


Saturday, October 30, 2010

Baklava and other perfect marriages..


This blog posting is dedicated to the rich dense honey-soaked flavors wrapped in a light crispy shell otherwise known as Baklava. The two concepts of the rich and chewy nut filling and the light and buttery phyllo crust combine to make a perfect marriage. Opposites do attract after all. Remember Beauty and the Beast or how about Fred and Wilma Flinstone or even Lucy and Ricardo. All of our favorite characters mimic this idea of opposites put together and delighting and entertaining us. Just like this dessert.

With Halloween just around the corner what better way to celebrate than with a dessert from another world.. the Middle East to be exact. And with lower sugar content than the average Halloween candy this just might keep everyone from reaching those much dreaded sugar highs and lows.

A couple of tips for you. The food processor was brilliant to grind the nuts and I would definitely start with the almonds before adding the walnuts so they turn out being ground evenly. Also, you can use any kind of nut that you like. We also managed to shave a few calories by using Splenda when we could and using Smart Balance butter to cut the saturated fat of the regular butter.

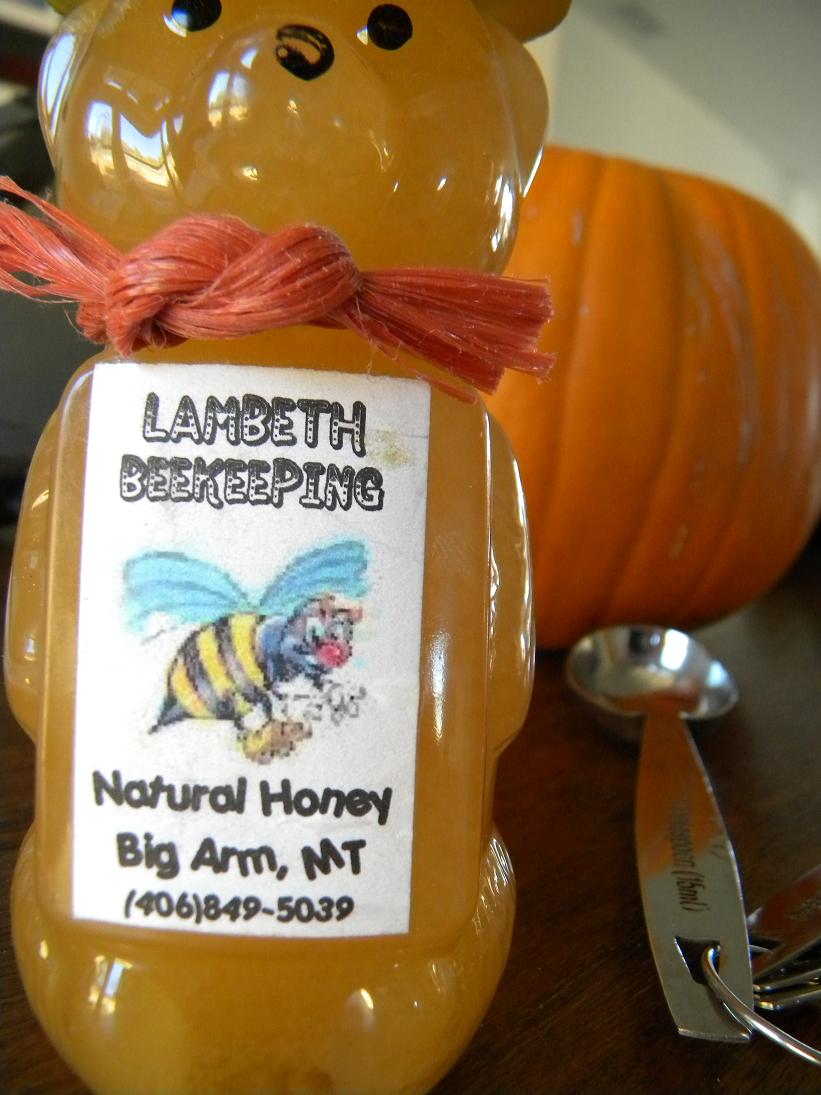
We also used the best honey we could find. Locally produced by Mr. Lambeth himself and we used a little bit of spiced rum just for fun. If you don't want to use rum you can always substitute vanilla extract.

Happy Halloween and may you receive more treats than tricks!

Baklava

for filling:

1 cup unsalted almonds
2 cups walnuts
1/2 cup milled flaxseed
12 packets Splenda
1 1/2 tablespoons cinnamon
1/2 teaspoon ground clove

For the layers:

1 package phyllo dough
3 tablespoons smart balance butter
2 tablespoons salted butter
1/2 teaspoon dark spiced rum
1/2 teaspoon cinnamon
For the syrup:

1 cup water
1 cup honey
1 cinnamon stick
1 teaspoon ground cloves

1. Preheat the oven to 325 degrees.

2. In a food processor add the almonds and walnuts and process for 30-40 seconds. The nuts will be coarsely chopped. You don't want to turn them to mill, just finely chop them so there are still some healthy chunks in there. 
3. In a bowl combine the chopped nuts, flax seed, splenda, cinnamon, and clove. Stir with a spatula to combine. Then set aside.

4. Melt the smart balance, butter, spiced rum, and cinnamon in the microwave for 30 seconds. Then lay your phyllo dough out on a flat surface and cover with saran wrap and a damp towel. Spray a 9 X 12 baking dish with cooking spray. 

5. Uncover the phyllo dough and work quickly using a pastry brush lay one phyllo layer at a time in the baking dish and brush with the butter mixture. Repeat this layering and buttering process until you have 12 layers of phyllo dough on the bottom. Re-cover the phyllo dough and pour the nut mixture on top of the bottom layer spreading into an even layer.
6. Then repeat the phyllo dough butter process using one sheet of phyllo dough at a time and completely saturating each layer with the butter mixture. The top layer should have 8 phyllo sheets. Next score the top layer of the baklava using a sharp knife into squares. Make sure to only puncture the top layer.

7. Place in the oven and bake for 45 minutes. 

8. Meanwhile in a medium sauce pan, combine the honey, water, cinnamon stick, clove, and squeeze half the orange and then drop the rind into the pan. Simmer over medium low heat while the baklava bakes. 

9. Once the baklava has come out of the oven ladle the syrup evenly over the top of the baklava making sure to saturate every inch of it with the delicious honey syrup. Let it sit at room temperature for at least 1 hour (this will be difficult) and eat! You can also refrigerate this if you would rather have it cold.

Servings: 20

Nutritional Skinny:

210 calories / 19 g fat / 21 g carbohydrates / 2.6 g fiber / 5 g protein

This is compared to the original that has over 330 calories and more than 22 fat grams and 30 carbohydrates!

Mental Health Benefit: This Halloween you can definitely feel a little better about eating this treat over a candy bar, however I know that not eating a candy bar on Halloween is kind of a crime. My biggest tip is to never, ever, ever beat yourself up. Treat yourself like you would your best friend. Forgive yourself and smile and move on. Life is to short to be spending it beating ourselves up. Life is to be lived and enjoyed! Lets go out there and do that!

My best Halloween wishes from our kitchen to yours!


Monday, October 25, 2010

Chocolate Whiskey Cupcakes

We recently found a advertisement for the best cake recipe EVER. Our first thought was the  Chocolate Whiskey Cake our dear friend Lee makes for every special occasion. She has made it for everyone's birthday and the latest was my sister's engagement party. She was even so wonderful as to bring me the recipe so I could write it up on my Ode to Twenty Eight blog.

Well, today I decided to actually make the cake. It's a cake with chocolate and whiskey, are you kidding? This is a no brainer! I think this is sure to win if it tastes anywhere as good as it sounds.
I made a few changes not because the cake needed changes, but because I didn't have all of the original ingredients she uses. I did a few 'operational work arounds' and made cupcakes. Believe it or not I don't have cake pans. Don't worry-- it's on the shopping list now. But who doesn't love cupcakes and since I am baking them for our sous chef's birthday at work, it makes it really easy to share.

While testing out this recipe I discovered how that I didn't have any milk powder. So I discovered how to substitute. Please forgive me if you are a kitchen protege and already know about this. If you don't have milk powder (like I don't) you simply used 1 cup of milk for every 1/4 cup of milk powder that is called for in the original recipe and then omit that additional cup or two of water the recipe calls for. Milk powder is a 1 to 4 ratio. For example this recipe called for 1/3 cup milk powder and an additional 1 1/4 cup of water. Instead I omitted the water and added 1 1/4 cup low fat milk.

Mom and I also just spent Sunday tasting wines at our local Mission Mountain Winery (located one mile from our house) and picked up some delicious Cocoa Vin dessert wine which we decided to use that for the frosting. The wine maker and owner Tom and his wife, Hema, are as delightful as the sun is bright and turned us on this this and several other wines we will be talking about in upcoming blog posts. 
As promised on our facebook page this is our first recipe of many incorporating their award winning wines. We used our two favorite ingredients: dark chocolate and Cocoa Vin chocolate liquor. A match made in heaven.

And don't worry if you don't have Cocoa Vin you can either order from the website (which is beautiful) depending on which state you live in or substitute any chocolate or coffee liquor. If you don't want to use liquor you can also substitute vanilla or rum extract. Enjoy!


Chocolate Whiskey Cupcakes with a Cocoa Vin frosting

adapted from: Lee’s Special Dark Chocolate Whiskey Cake

Heat oven to 350 degrees F.

Dry Ingredients

2 C. Organic Flour
1 ½ tsp. baking soda
¾ C. Dark Chocolate Cocoa
1 tsp. salt
1 ½ tsp. baking powder
1 tsp. cinnamon
1 tsp. dried clove powder

Wet ingredients

2 eggs
3 teaspoons vanilla
½ C. Irish whiskey (we used Bushmills)
¾ C. honey (we used local Lambeth Honey)
½ C. water
½ C. canola oil
1 cup milk (or fat free half in half is what we used)
 
1. Mix the flour, baking soda, cocoa powder, salt, baking powder, cinnamon, and clove together. Set that bowl aside.

2. In a separate bowl combine the wet ingredients and stir with a whisk until the honey softens into the other ingredients.

3. Then pour the wet ingredients into dry ingredients and mix well-about 2 minutes on medium. (You don't need the additional ingredients as the original recipe called for because we used milk instead of the milk powder.) Batter will be thin.

4. Spray your muffin tins and fill with 1/4 cup of batter. Cook 20-25 minutes or until toothpick comes out clean. Cool the cupcakes for 20 minutes then remove from pan and cool on rack. 
 5. When cup cakes are cool, they are ready to frost with the delicious frosting below!


Cocoa Vin Chocolate Frosting
1 T. organic butter
1 (3.5 ounce) bar Hershey's dark chocolate; chopped 
3 tablespoon honey
2 tablespoons cocoa vin (If you can't find Cocoa Vin any chocolate or coffee liquor with work!)
3 Tablespoons Cocoa powder

1. Melt butter and chocolate in the microwave for 1 minute at power 50. Remove and stir until chocolate is completely melted and smooth. 

2. Add the cocoa vin, honey, and cocoa powder. Stir to combine with a whisk until it is smooth and shiny. 


3. To frost hold the bottom of the cupcake and dip the top in the frosting. Remove from the frosting and swirl to get a clean frost on the cupcake. Repeat with all of the cupcakes and allow to set for 15 minutes.


Servings: 24 cupcakes

Nutritional Skinny (without frosting):

127.5 calories / 5.1 g fat / 18. 3 g carbohydrates  / 1.2 fiber / 3 g protein

Nutritional Skinny (with frosting):

165.3 calories / 7.1 g fat / 24 g carbohydrates / 2 fiber / 3.5 protein 


Mental Health Benefit:  When you think about chocolate cupcakes you usually think sinful-- right? Well, these taste completely sin-licious. I put one in my mouth and was transported to the palm of an angel's hand. Then I calculated the calories and was blown away. These not only are lower in fat and calories than other options they are also loaded with anti-oxidants and flavonoids in chocolate that protect our bodies from free radicals (those nasty things that cause aging) and have been shown to lower blood pressure. So as sin-licious as these taste, there are some really important health benefits if we eat them in moderation! Okay.. good luck with that!


~ Why not meet me in the kitchen and get cooking!


Friday, October 22, 2010

Wild Game in the Wild West

I live in the Wild Wild West. Northwest Montana to be exact. When I forget and think I'm back in Chicago, there are a few things that remind me:
  1.  There are illuminated road signs that instead of indicating the commute time, they inform travelers to watch for grizzly bears crossing the road for the next 5 miles.
  2. My parents had cocktail hour with a black bear last night and he has sort of become our new pet (my cat isn't thrilled about this).
  3. The only sky scrapers around are the giant Mission Mountains out our back door.
  4. Everyone I have met has elk, venison, grouse, bobcat, bear, and other wild animals in their freezers.
In honor of the opening of hunting season kicking into high gear, I am sharing some of our favorite wild game recipes! This will also celebrate the circle of life that we experience every time we eat something that is so graciously provided for us by mother earth.

Don't worry if you don't participate in this circle of life phenomenon called hunting. You can use regular beef or pork for these recipes and it will taste just as delicious.
I'm sharing a wonderful and easy Elk Cutlet recipe (made from the back strap which is the best cut off the animal) along with a fabulous slow cooked Spicy Asian Venison Roast and delicious and healthy Whipped Potato and Carrot side dish that pairs perfectly.


Tips for cooking with wild game:
  • Since these cuts are extremely lean, you want to be careful not to over cook. All cuts should be prepared rare or medium rare for maximum tenderness.
  • Meats can be aged in the refrigerator for 3 to 7 days to enhance tenderness
  • Marinade meats in soy, wine, ginger, or garlic based sauces (we use all of them in our recipe)
  • For more tips and recipes
Both cuts of meat were delicious and extremely tender and juicy and I didn't even need a knife, just a fork. And with almost half the calories, a third the fat, and more than 6 additional grams of protein why shouldn't it be what's for dinner?

Beer and wine pairing suggestions:

Wine - We recommend serving this with a bold red wine (we love Crane Lake Cabernet Sauvignon) which is consistently delicious and cost effective)

Beer - a great Amber beer (we love the Local Tamarack Yard Sale Amber and Full Sale Amber is also delicious).

Elk Cutlets
6 (4 ounce) elk cutlets * if you don't have elk you can substitute with sirloin beef cuts.

For the breading and dredging station:

1/2 cup whole wheat flour
1 teaspoon seasonal salt
1 teaspoon pepper
1 teaspoon red pepper
2 teaspoons garlic powder

2 eggs, beaten

1 cup Italian bread crumbs

1. To start, gently pound out each cutlet using a mallet to tenderize. Lightly pound them out, but don't get too out of control. We want to eat this remember?

2. Next we'll set up the dredging station. Place three separate shallow bowls on the counter. In the first add the flour, salt, pepper, red pepper, and garlic powder. In the second bowl add the beaten eggs. And in the third, you guessed it, put those bread crumbs in there.

3. Now take each cutlet and dredge through the flour mixture, then give it a bath in the egg mixture and finish with a jump in the bread crumbs.

4. Heat a skillet with olive oil or vegetable oil. You'll only need about 1 tablespoon in the bottom. Once the pan is hot, place each cutlet and cook for about 4-5 minutes on each side. Then you are ready to transfer to a plate and eat!

Servings: 6

Nutritional Skinny:
211 calories / 3.3 g fat / 31 g protein

Compared to beef cutlets: 462 calories / 26.2 fat

Spiced Asian Venison Roast
1 white onion; chopped
1 green pepper; sliced
4 cloves garlic; minced
1 1/2 pound venison roast
1 tsp. chicken rub
1/2 tsp. dried rosemary
1/2 tsp. dried garlic powder
2 tsp. Worcestershire sauce
1 cup dry red wine (we love anything from Australia)
2 tbsp. soy sauce (low sodium)
Juice of half of a lemon
3 sprigs fresh rosemary
2 bay leaves

Note: our roast sat in the fridge for 7 days which made it extra tender!

1. In a large crock pot add the diced onion, peppers, garlic to the bottom. Turn the crock pot on to low.
2. Take the venison roast and sprinkle the chicken rub, rosemary, and garlic powder on both sides. Place the roast on top of the onions and peppers in the crock pot. Add the two bay leaves to the crock pot.

3. In a separate bowl combine the Worcestershire, red wine, soy sauce, and lemon juice. Stir to combine, then pour over the meat in the crock pot. Add the rosemary and bay leaves and cover. Cook on low for 6-8 hours. The meat will come out tender and delicious. Slice and serve reserving the broth for a gravy.

It will separate easily and the sauce is to die for! Serve with the Whipped Potato and Carrots for a complete nutritionally sound meal!

Servings: 6-8


Nutritional Skinny: 
159 calories / 3.3 g fat / 25 g protein


Whipped Potatoes and Carrots

1 pound baby carrots; chopped
1/2 pound red potatoes; cubed
4 ounces low fat cream cheese
1/2 cup 1% milk
Salt and pepper to taste

1. In a large pot place the chopped carrots and potatoes and cover with water. Cook over medium high heat for at least 60 minutes. The water should be lightly bubbling.

2. Once the potatoes and carrots are both softened, pour the water off and add the cream cheese, milk, and a pinch of salt and pepper (approx 1 teaspoon each). Using a mixer whip the potatoes and carrots until smooth.

3. Serve with the Venison roast with some of the broth poured over for an added treat.

Servings: 10


The Nutritional Skinny : 
119 calories / 2.5 g. fat / 21 carbohydrates / 2.5 g fiber / 3.6 g protein

Mental Health Benefit: There are always alternatives to the standard pork, beef, and chicken. Why not experiment with something new? Bring a new zest to the dinner table. It's sort of like getting a new style of jeans or a new hair cut. Cooking with something new adds a little extra spring to the step and a little more confidence that we all need to take on the world each day! Oh, but don't feed the bears. That's how we ended up we a new pet... we found out they really like bacon.

Now get your Hot Mess Self in the kitchen! :)
 

Monday, October 18, 2010

BLT and Simple Pleasures

Just a word on bacon. Should we use it in moderation? Yes. Is it delicious? Yes. And finally does a small amount go a long way? Absolutely.
With that out of the way, let's talk about one of the most delicious sandwiches known to human kind. The BLT. It's simple, tasty, and always satisfying. I realize that a recipe for a BLT seems rather silly, right? Well, I might agree with you, however I have been making these sandwiches for years and there are certain tricks to making them even tastier. 

A few of those tricks are: 1) Get the yummiest bread you can possibly imagine, 2) Cook the bacon until it is just slightly crisp, but still has a little softness, 3) Skip the mayo and go straight for ranch (I used the Kefir light Ranch with probiotics), and finally 4) add some fresh basil! Trust me on this last one!
Then after wards, go play outside. There are horses just below me and they love to play, but if you don't have horses to play with maybe you have kids, a dog, or a neighbor who would like to come out and join you. Either way getting out in the great outdoors makes this sandwich somehow taste even better. And play is exercise! Don't forget that! I went with my honey and we tromped through the woods in hot pursuit of some fire wood. As we were bumbling through I looked around and commented, "Somehow being out in the woods makes you realize that nothing really matters. You know?" To which he responded, "Yeah, it's important to remember how simple life can be."

Exactly, just like our lunch. Simple and delicious. For simple pleasures.. I am so grateful..

Now here is my secret recipe for a slammin' BLT! And check out the nutritional 'skinny' below!

Bacon Lettuce and Tomato Sandwich (the Famous BLT)
 yields 3-4 sandwiches

1 package smoked bacon
4 focaccia rolls
1 head of romaine lettuce
1 fresh ripe red tomato
1/4 cup Kefir Light Ranch dressing
1 bunch fresh basil leaves

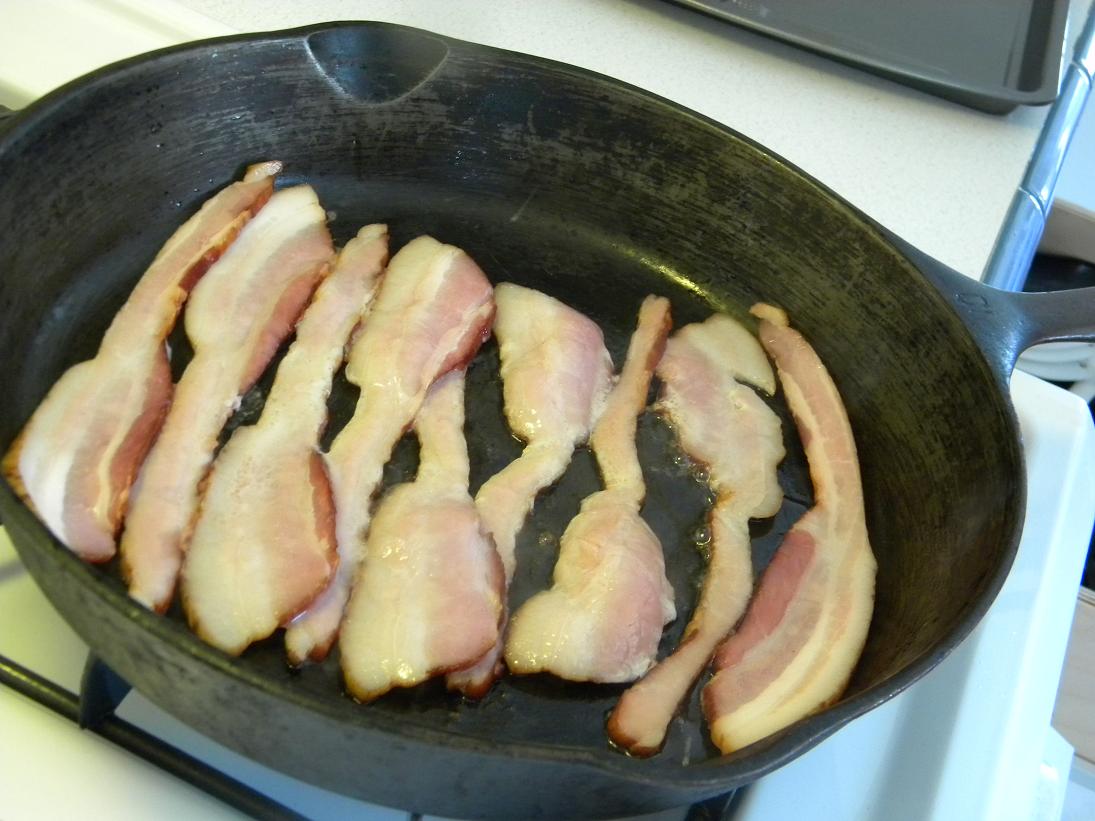
1. Start with your favorite skillet and fry up the bacon low and slow. The key to delicious bacon cooked perfectly is cooking it over low heat slowly so it can crisp without becoming hard and brittle. Cook each slice over low heat for about 8-10 minutes on each side. Once each slice is cooked drain on a paper towel. 
 2. Slice the most delicious ripe tomato you can find (we found a perfect one at the Helena farmer's market). Clean and separate your romaine lettuce and slice each focaccia roll in half. I loved the whole grain focaccia we found at the bakery. It made the sandwich even tastier! 
 3. Now we build the sandwich.Spread a thin layer of the Kefir Ranch dressing on each half of the roll. Place a slice or two of tomato on the bottom of the roll and add salt and pepper to taste. Place two slices of bacon to the top and add 2 leaves of romaine lettuce and 4 leaves of fresh basil. Place the top of the roll on and eat!


4. This would be tasty with some fresh cantaloupe or a slice of pear. We ate them just as is and were beyond satisfied.

Nutritional Skinny:

280 calories / 14 g fat / 22 g carbohydrates / 13 g protein


Mental Health Tip: So the lesson today is if you want something delicious like bacon, go ahead and have it. We have to live thoroughly right? However, remember that a little goes a long way. Two slices is all you need to get that yummy buttery flavor and load up on tomatoes, lettuce, and basil. You will get the vitamins you want and the flavor that satisfies without sabotaging your girlish figure. Go outside and live thoroughly. There is nothing better than getting lost in the woods.

Friday, October 15, 2010

Dangerously Delicious Layered Raspberry Cake

Trust me on this one. This Raspberry Layer Cake is delicious. No joke. When I served it to my dinner guests they were stuffed from eating steak, shrimp, and potatoes and every single one of them (me included) finished our own huge piece. It is that good. Seriously. Try it yourself, but at your own risk. I sat one evening and ate close to half a pan with a spoon right out of the dish.
Yes, I did. I'm not proud of it. But I did it.

My theory on that is that with the cream cheese and whipped topping, it just sort of melts into the cracks so there is always room, right? Make this cake and you won't be sorry unless you eat half a pan by yourself like I did. Even then, you won't really be sorry you ate it all, you will be more sorry that it's all gone.
Then a trip to the store will follow shortly after to make another cake... Yes, it's that good.

Now let's get on with the recipe!

Raspberry Layer Cake

for crust:

1 1/2 cups Graham Cracker Crumbs; reserve 2 tbsp.
1 tsp. Cinnamon
1 tbsp. Vanilla Extract
1 tablespoon Milled Flax Seed
2 tbsp. Smart Balance Butter; melted

for raspberry filling:

10 ounces Frozen Raspberries
1/2 cup Baking Splenda
1 tbsp. Corn Starch
2 tbsp. Water

for Cream cheese layer:

8 ounces low fat cream cheese
1/2 cup Baking Splenda
4 ounces Light Cool Whip

for topping:

4 ounces Light Cool Whip
2 tbsp. reserved graham cracker crumbs mixture
1. Take your graham crackers and break them up in the food processor and pulse for about 30 seconds or until you get nice thin crumbs. Then add the flax and cinnamon and pulse for a few more seconds.
2. Then in a microwave safe bowl melt the butter for 45 seconds. Pour into the graham cracker crumbs. Add the vanilla and mix until a moist crust forms. Spray the bottom of a large pan and press firmly into the bottom.  Spread on the bottom of a round deep dish pie plate. Bake in a 350 degree oven for 15 minutes. Then set aside to cool.
3. Combine the water and corn starch until the water is smooth. 
4. In a sauce pan combine the raspberries, splenda, and corn starch mixture stirring over medium heat until the mixture thickens-- about 5-6 minutes. Then remove from heat and set aside to allow to cool and continue to thicken. 
5. In a large separate bowl, combine the cream cheese and splenda creaming it until it is smooth. Then carefully fold in the cool whip until it looks like clouds! Set aside.
6. Now we build the beautiful dessert! Spread the cream cheese layer over the  graham cracker crust. Top with the raspberry filling. Then spread the remaining 4 ounces of cool whip over the top and sprinkle with the topping mixture.  Refrigerate for at least 30 minutes, but you can do it for up to 24 hours if you so desire! Delicious and oh so easy!

Servings: 12

Nutritional Skinny:


200 calories / 11 g fat / 2 g carbohydrates / 2 g fiber / 2.7 g protein

Mental Health Tip: This dessert can be even lower in fat if you want to use fat free cream cheese and cool whip. And it will taste just as good. Most of the flavor comes from the super delicious and healthy raspberries! Enjoy yourself and these fresh flavors of summertime!